Wednesday, May 30, 2012

Cookbook Wish List

I read cookbooks like most people read novels. I just really enjoy picking up a cookbook and looking at it over and over again. Of course, I have my favorites. Some are just more loved and worn out than others. For me, relaxing means curling up on the couch with a stack of my favorite cookbooks and dreaming about what I'm going to make next.


My Cookbook Wish List:


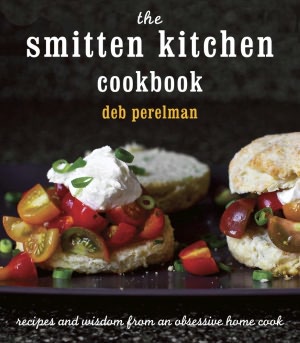
This book hasn't even been released yet, but I know I want to read it. I've followed the Smitten Kitchen blog for a while now. Always amazed at the photography.


The release date for this book is October 30, 2012. I have almost all of Ina Garten's cookbooks. I swear if I had to pick just ONE chef on Food Network to cook for me, it would be Ina. She is my Julia Child.


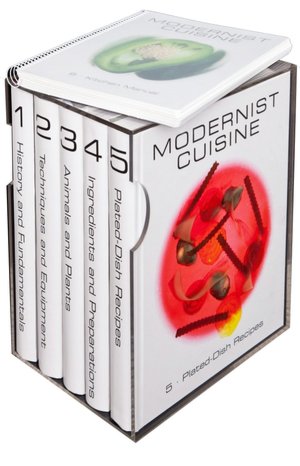
I know this is a little far fetched since this cookbook retails at $450, however if money was no object, I would definitely buy this set. It looks like a piece of art just sitting on a shelf.


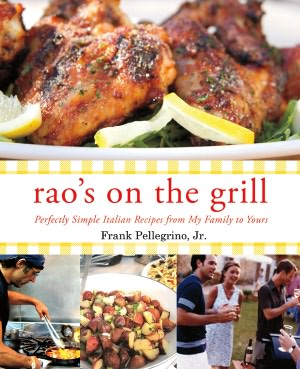
If this cookbook is anything like their spaghetti sauce, then it will be fabulous. Italian food on the grill seems interesting.


What cookbooks have you picked up recently? Have any favorites?

Wednesday, May 23, 2012

Tuscan White Bean Dip


A favorite Italian restaurant of mine called Paesanos serves this dip as a starter before your meal along with bread and olives. I'm usually so busy gorging myself on the dip that by the time my meal comes I'm not even hungry. I have no idea what their recipe is so I had to invent my own. I have to say it comes pretty darn close. It is luscious, creamy and delicious.


Tuscan White Bean Dip:
1 15 oz Cannellini white beans
1/4 cup garlic, rosemary and red chili infused olive oil 
(you can make this by following the recipe here or buy an infused oil at the store)
1 tablespoon sundried tomatoes
salt & pepper to taste

Directions:
Drain beans and place them in a food processor. Add in the sundried tomatoes,infused olive oil, salt & pepper and puree. 


*** I served this with Naan bread, which I cut into 1 inch strips, brushed with olive oil, sprinkled with smoked paprika, black sesame seeds, cumin seeds, caraway seeds and broiled in the oven until golden brown. For a gluten free alternative, you could serve it with sliced veggies. ***

Note: I use generous amount of olive oil to get a smooth consistency in my dip. If you like your dip to be bit more chunky, just scale back on the oil.


Enjoy!

Wednesday, May 16, 2012

Homemade Ricotta Cheese


I recently picked up a fabulous Italian cookbook at the used bookstore the other day that had a recipe for homemade ricotta cheese or as Giada likes to call it, "Ree-Coat-ah". My husband and I were intrigued with the idea of making cheese and were curious how it would taste compared to a store bought one. Well...I can tell you...it was delicious! The texture is creamy and it taste fresher than store bought. The best part is it doesn't take that long to make. The homemade ricotta was a great accompaniment for this salad which included sundried tomatoes, capers, red onion and romaine lettuce. 

For more cheese making posts, check out Maggie's blog Notes from Maggie's farm. For those of you who are lucky enough to live close to Austin, Maggie is offering cheese making classes this fall. For a preview, click here.


Homemade Ricotta:

4 cups whole milk
1 cup heavy whipping cream
2 tablespoons fresh squeezed, strained lemon juice
1 1/2 teaspoon kosher salt
**cheesecloth for straining**

Directions:

Pour milk, cream, lemon juice, and salt in a small heavy-bottomed stainless steel saucepan. Do not stir and bring to a boil. Turn off heat, set the saucepan aside until mixture has cooled (about 5 -10 minutes). Line a strainer or colander  with cheesecloth and place it in the sink. Gently scoop up the curds out of the saucepan and place in the strainer to drain. You can use the ricotta while it is still warm or you can place the cheesecloth filled with cheese over a bowl to drain and store in the fridge for 2 days. 

Makes approx. 8 ounces. 
Adapted recipe from a fabulous used Italian cookbook.

Note: I would double or triple the recipe. Our cheese went pretty fast!

Enjoy!


Wednesday, May 9, 2012

Crab Cakes with Remoulade Sauce

Crab Cakes with  Remoulade Sauce served over a bed of Arugula.

When I asked my Mom what she wanted for Mother's Day she said my crab cake recipe. No Joke! I feel bad that I've been hesitant to share this recipe with her. There are two reasons I've been so reluctant. First of all, I hardly ever follow a recipe and although I have a general idea of how to make them, I don't have exact measurements. Secondly, it is kinda nice to finally have something I can make for her. A recipe that she actually has to ask me for. This post is for you Mom. Now you have my secret crab cake recipe. To the best of my knowledge...


Crab Cakes:

2 containers of 16 oz. lump fresh crab
1 small carrot, finely chopped
1 celery stalk, finely chopped
1/2 small red bell pepper, finely chopped
1/4 cup red onion, finely chopped
1 tablespoon Old Bay seasoning
1 teaspoon dried dill
1/4 teaspoon Tabasco
2 egg whites
1/3 cup mayonnaise
1 cup Panko breadcrumbs
 clarified butter for frying


Directions:

Add all the ingredients together in a large bowl, mixing with your hands or a large spoon. Gently  scoop up the mixture and form into patties. I usually roll mine into a ball and then press them down into patties. If the mixture is not sticking together, add more mayo. If the mixture is too wet, add more panko breadcrumbs until the patties hold together. Coat the patties with Panko before frying.


In a large skillet, over medium heat, add clarified butter. When the butter is hot, add patties, spacing them evenly in the pan. When the patties have turned golden brown on one side, flip them and continue to cook them. This should only take a couple of minutes, depending on how hot your skillet is. 

Place patties on a large plate lined with paper towels. 


Remoulade Sauce:

1 cup mayonnaise
4 tablespoons ketchup
1 tablespoon grainy mustard
1 tablespoon prepared horseradish
1 teaspoon worcestershire sauce 
2 tablespoons chives, chopped
1 tablespoon capers 
salt and pepper to taste

Mix all ingredients in a together in a bowl. 


Enjoy!


Saturday, May 5, 2012

Happy Cinco de Mayo & Cookbook Winner

{via yospeakespanol}


Hope everybody is having a great May 5th. The winner of the Texas on the Plate cookbook giveaway is John @ luvs2eat.com. Yay! **Throws confetti** Congratulations! A big thank you to everybody that entered.

Tuesday, May 1, 2012

Blueberry Lemon Brownies


Just like fellow Texas food blogger Mary at Food Joy, I have a tendency to want to add lemon to everything this time of year. When I came across this recipe at Cooking Classy, it was calling my name and saying things like, "Bake me. You know you want to. I promise you won't regret it." By now I'm sure you are well aware of my baking phobia. Well, this dessert definitely helped me overcome it. This brownie was unlike any I've ever had. It was moist, with a more cake like texture than a crumbly cupcake or a dense brownie. All I can say is it was delicious! I'm definitely planning on making it again, but next time I'm doubling the recipe. 
 

*Recipe adapted from Cooking Classy

 Blueberry Lemon Brownies:

3/4 cup all-purpose flour
1/4 tsp baking powder
1/4 tsp salt
1 large egg
2 large egg yolks
3/4 cup granulated sugar
6 Tbsp. butter, softened
1/4 cup sour cream
1 Tsp lemon juice (the juice of about 1/2 lemon)
3 tsp. lemon zest (the zest of about 1 1/2 lemons)
1/2 tsp vanilla extract
3/4 cup frozen or fresh blueberries
1 recipe white chocolate glaze, recipe follows

Directions:

Preheat oven to 350 degrees. In a mixing bowl, whisk together flour, baking powder and salt, set aside. In a large mixing bowl, using an electric hand mixer, beat egg and egg yolks on medium speed until pale and fluffy, about 3-4 minutes. Add in sugar, butter, sour cream, lemon juice, lemon zest and vanilla, mix until well blended. Add in dry ingredients and mix just until incorporated. Fold in blueberries. Pour mixture into a buttered 8 x 8 baking dish and spread into an even layer. Bake 30-34 minutes until a toothpick inserted in the middle comes out with a few moist crumbs attached. (I used frozen blueberries, and cooked mine for 33 minutes). Allow Brownies to cool completely, then pour the white chocolate glaze over top and spread over evenly. You can freeze bars for 10-15 minutes after baking for quicker glazing.


White Chocolate Glaze:

1 cup white chocolate chips, or 6 oz. chopped white chocolate
3 Tbsp. half and half

 
Directions:

Melt chocolate by tempering it on the stove. Add in half and half and stir together until completely incorporated. 


**Recipe yields approx. 6 brownies**
**Note: I doubled the glaze recipe from the original recipe.**

Enjoy!